Origami part 2 : Platonic Solids and Colorization
Created on August 22, 2018. Last update on January 2, 2019.

In the Micmaths’ video, the base polyhedra are the 5 platonic solids, namely: the tetrahedron, the cube (or hexahedron), the octahedron, the dodecahedron and the icosahedron.
What I quickly realized from the video (and also because I had worked with paper cubes beforehand) is that building the models from white paper only would be quite boring. So I decided to use colored paper (brand name ?) and the natural questions I faced were 1) which color for which face and 2) what color to choose. Please note that these two questions are of different natures, the first is of mathematical interest and the second of artistic interest. Obviously, one could argue that the choice of the final coloring (when many solutions are possible) also have an artistic side to it and I would agree.
Face coloring
The first constraint I imposed myself for the face coloring was that on a pyramid one color would appear only once. In the augmented solid, each paper module makes up two faces. These faces belong to two neighboring pyramids and face each other (sharing the same edge) as the main fold of the module is an edge of the base polyhedron. So coloring the pyramids is actually equivalent to coloring the edges of the base polyhedron such that in a face no two edges are of the same color. The second constraint I chose is to use the minimal number of colors for the whole shape.
The colorization of a graph is a well known NP problem in graph theory but at the time I chose not to solve the coloring with a software but manually. Retrospectively, it was not a such a bad idea but I eventually made some program to solve (partly) for this problem, see the post on rendering. Anyway, I took the manual path which necessitates first to make the graph of the mesh of the base polyhedron. Hopefully, this graph (also named skeleton [2] or Schlegel diagram [1]) is planar and I was well versed in the use of Geogebra. By the way, I strongly recommend this software for any math problem that has a link with geometry. In the end, from my experience in the matter, coloring the edges of the graph manually is not so hard since the meshes of the platonic solids are relatively small and that a lot can be inferred from the symmetries of the shape. It felt a lot like solving a Sudoku puzzle, having colors instead of numbers.
I should also mention that, at first, I did not need this colorization scheme for the module assembly of the first 3 simple solids (4-,6- and 8-hedron) but I failed repeatedly when directly assembling the augmented icosahedron because the same color would always appear twice on a pyramid at some point. From this moment on, I decided I needed some rigorous color planning.
I found out that the minimal number of colors is equal to the number of edges in a face. Table 1 regroups the module and color numbers. There is possibly more than one possible coloring for the icosahedron or dodecahedron but I will talk about that later, TODO: see later.
Colored skeletons are illustrated in Figures 2, 3, 4, 5 and 6.
| Solid name | #edges/modules | #colors |
|---|---|---|
| Tetrahedron | 6 | 3 |
| Cube | 12 | 4 |
| Octahedron | 12 | 3 |
| Dodecahedron | 30 | 5 |
| Icosahedron | 30 | 3 |
Picking colors
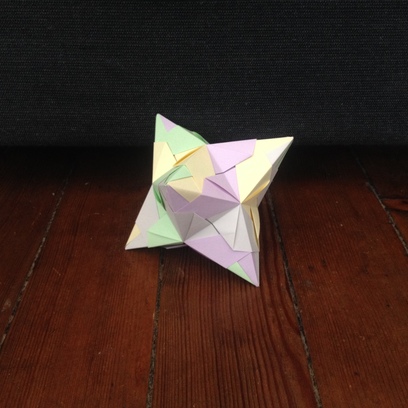
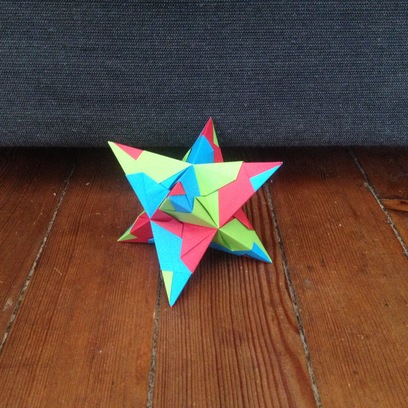
With the previous analysis I knew the number of color I needed, so what was left was to choose which color to take to make a non-ugly arrangement (that’s hard to !). I got my origami paper in a set of a hundred paper pieces with ten different colors: red, green, blue, orange, yellow, pink, light purple, light yellow, light green and light gray. This is basically up to my own preferences but I decided to have some interesting/thematic arrangements. Picking colors took quite some time in the end but it was mostly guided by my feelings.
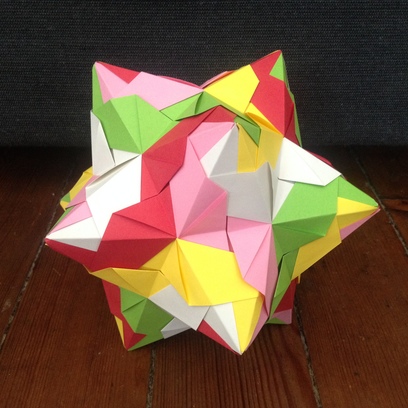
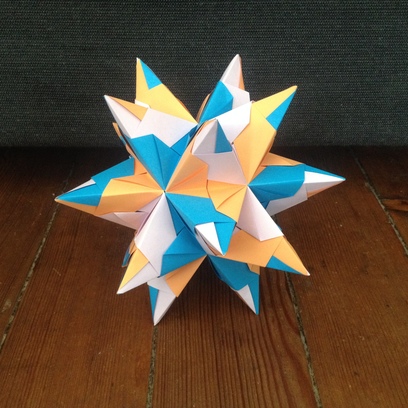
The themes for each platonic solids are (more or less): "Light and pale" for the cube, "RGB" for the octahedron, "Flowers" for the dodecahedron and "Opposite" for the icosahedron.
Please note that for the augmented tetrahedron, I have not followed the graph coloring. I simply used the remaining pieces of paper I had and ended up with one color for each edge, 6 in total. And no color theme what so over.
Gallery
At last, here are the resulting assembled models, see Figures 2, 3, 4, 5 and 6.


References
[1] Eric W. Weisstein. Schlegel graph. http://mathworld.wolfram.com/SchlegelGraph.html. Accessed on 08-16-2018.
[2] Eric W. Weisstein. Skeleton. http://mathworld.wolfram.com/Skeleton.html. Accessed on 08-16-2018.